Positive Pay Format
Since Positive Pay formats and specifications can be different based on the bank, this workflow allows you to design the format based on your bank requirements.
1) From the Manage Corporations list, click on the Corporation Name.
2) From the Corporation detail, select the Bank Accounts segment.
3) From the Bank Accounts list, click the Bank Account Name for which you want to create or edit a positive pay format.
4) From the Bank Account detail, select the Positive Pay format segment.
5) The Positive Pay Format detail displays. Click Edit to update the fields. When you are satisfied with your selections, click Save.
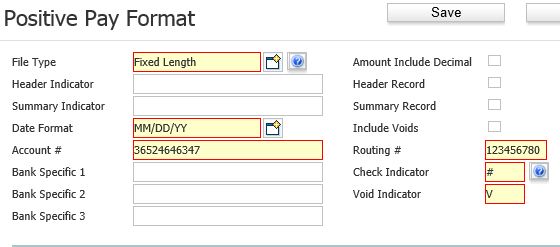
The Positive Pay Format screen has two sections. The top part contains general information about the Positive Pay Format. This information will be provided to you by your bank.
File Type is either Comma-delimited or Fixed Length.
Header Indicator is required if Header Record is checked.
Summary Indicator is required if Summary Record is checked.
If Header Record is checked, then the first row of the file is designated as the header record.
If Summary Record is checked, the last record of the file is designated as the summary record.
The bottom part allows you to actually specify record format. The screen shot below shows the Header Record section. The Detail Record and Summary Record sections are identical.
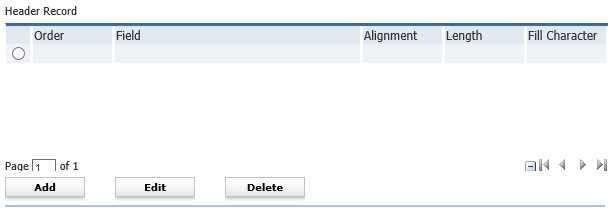
Click Add to add a new row to the record. The system will automatically order the rows in the order you add them. You will need to provide the field name, alignment (right or left justified), length and fill character (blank or zero fill).
Select a row and click Edit to change the field name, alignment, length or fill character.
Select a row and click Delete to remove a row.
NOTE: If the File Type is Comma-delimited, alignment defaults to right justified and fill character defaults to blank fill.