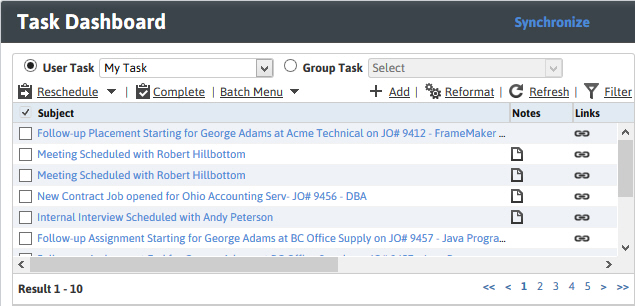
Task Dashboard
The Task Dashboard is used to keep track of follow-up items for Candidates, Clients, Contacts, Job Orders and Assignments. Most entities have a Task List found at the bottom of the entity’s Segment Control Panel. Use these instructions to view and run follow-up workflows for tasks assigned to you.
1) Mouse over My Adapt on the main navigation bar and select the Task Dashboard link from the drop down menu.
2) After selecting Tasks the segment will display a dashboard of the tasks assigned to you.
3) You can view tasks assigned to a single user by clicking the User Task radio button and selecting the user whose tasks you want to view in the droplist. You can view tasks assigned to a group by clicking the Group Task radio button and selecting the group whose tasks you want to view in the droplist.
4) At the top, left of the dashboard are the standard workflow options available for each task listed. Select one or more tasks and then click on the workflow.

§ Reschedule – use this option to change the due date on the selected tasks. Choose from a drop down menu to reschedule the task(s) for the next day, next week, and next month or open a calendar and select a specific date.
§ Complete – use this option to change the status of a task, update the completed date and percentage.
§ Batch Menu – (if configured) use this option to run batch workflows against the task(s). A drop down menu will display the workflows.
5) The top, right of the dashboard are options that allow you to add a new task, change the columns displayed, refresh and filter tasks.

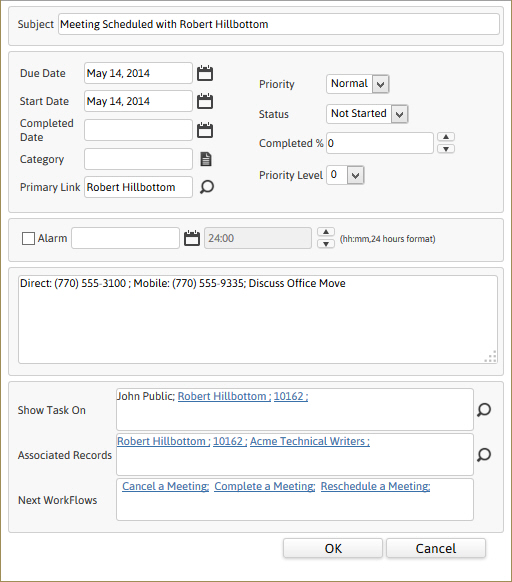
6) Select Add, fill out the desired fields and click OK to add a new task.
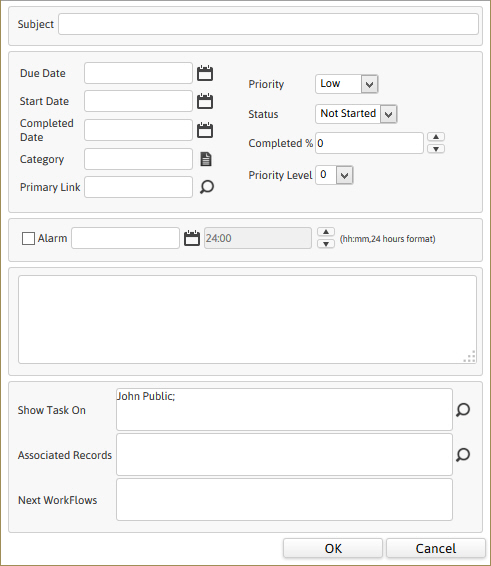
§ Subject – this is a mandatory field that must be populated before creating the task.
§ Category – (if configured) will assign a color to the task for sorting in the dashboard.
§ Primary Link – assign a record to display entity information for the task in the preview pane and activity menu.
§ Priority Level – assign a priority level between 0 (no priority level) and 10 (highest priority).
7) Tasks can be sorted by clicking on the column header, except for the Notes, Links or Activity columns.
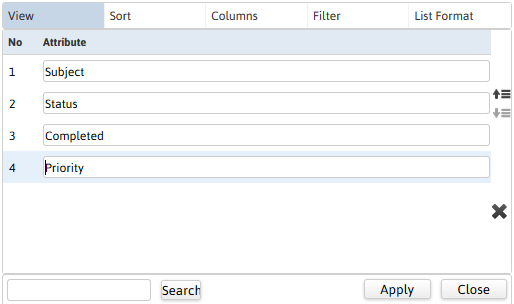
8) Select Reformat to open the formatter tool in a new window. Change the columns and the details of the displayed tasks by selecting desired fields; save settings by clicking apply.
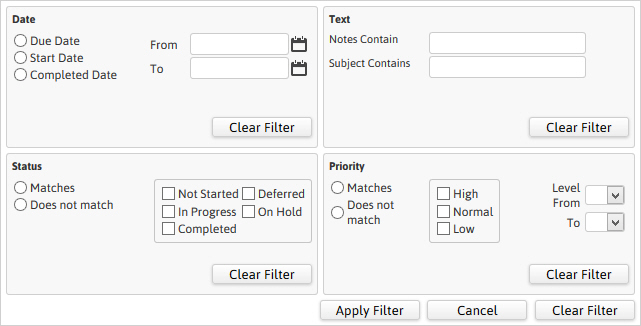
9) Select Filters to open the options in a new window. Fill out the desired fields and when completed, click Apply Filter.
Filter on Date of task, Text in task, Status of task or Priority of task or any combination of the four options.
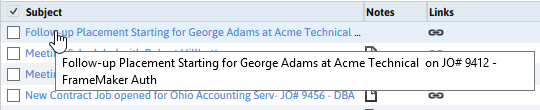
10) Hover over the task subject to read the complete subject in a tooltip window.
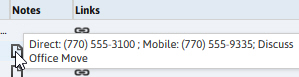
11) If there is a note icon next to the task you can hover over the icon to see the task.
12) Hover over the links icon to see all of the records associated with the task; click one of the records to open and view that record.

13) Hover over the Activity icon to see and run workflows applicable to the Primary Link in the task.
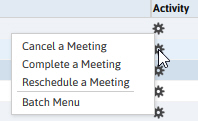
If batch workflows are configured, workflows that are available for the primary linked record are displayed at the bottom of the activity menu.
14) Click on the task subject to open and view the task.
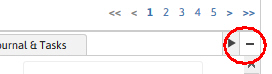
15) The task dashboard displays your total task count and you can page through the tasks with the page numbers or using the arrows.
16) Click on the plus (+) icon to expand the preview pane.

17) Select a task and view the primary linked record in the preview pane.
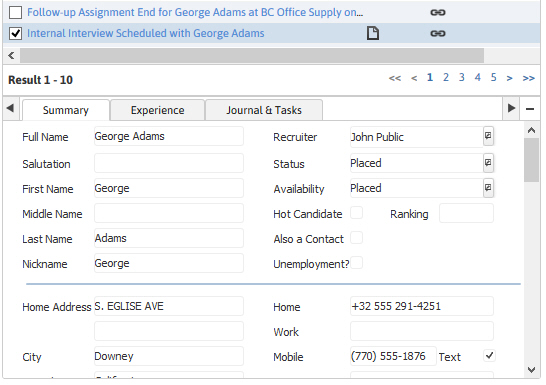
18) Scroll to view the data on the segment or click and drag the divider line up to expand the view.
19) The preview pane displays full segments from the entity. Run segment workflows by clicking on the buttons.

20) If there are workflows that would follow the original workflow, e.g. Schedule a Meeting is followed by Complete a Meeting; you can run that workflow from the Journal & Tasks tab.

21) Click the dash (-) icon to collapse the preview pane.