Resume Import
The Resume Import module provides a means to create Contract Candidates by automatically extracting information from resumes and creating or updating entities with the data.
1) There are a number of ways to access Resume Import. From the adapt.studio menu, you can hover your mouse over the Import Studio option and then select Resume Import. From the People menu, you can select Resume Import. From the Searching menu, you can select Resume Import.
2) The Adapt screen will refresh to display the Resume Import segment.
Navigation of the Resume Import Segment
Upload: The Upload button is used to upload resumes to AdaptSuite. Clicking the button opens a new window allowing you to upload from a networked folder, a mailbox email or from a web search. If you select "Folder", a standard Upload files screen displays allowing you to select the resumes and upload them. If you select "Mailbox", AdaptSuite attempts to import the selected email in Outlook. You may either import an email attachment or the body of the text. If you select "Web Search", a window displays allowing you to enter search criteria and select the Search Engine you want to use. Once uploaded, basic information about the resume displays on the screen.
Delete: This button is only active if you have selected at least one resume (by placing a check in the box on the right hand side of the row containing the resume). Clicking this button removes the resume from the list of resumes on the screen.
Import: This button is only active if you have selected at least one resume. Clicking this button imports the parsed resume into AdaptSuite. If a potential duplicate is found, the duplicate is displayed and you can either create a new record or update the existing record.
Pending Results: Once resumes are imported, clicking this button create a search result (saved search) for all records created or updated.
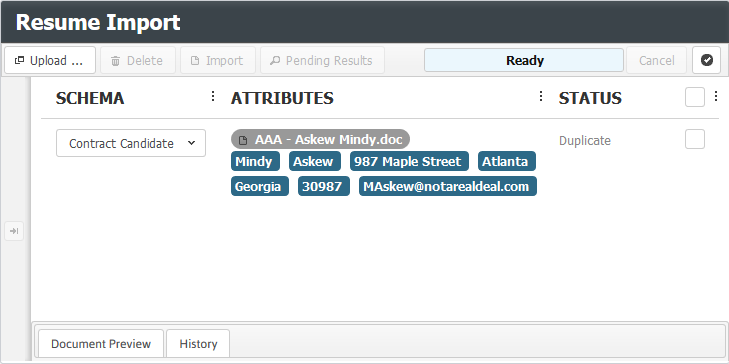
The Resume List
The Resume List, directly below the workflow tool bar, displays all resumes pending import. It displays the name of the file, as well as the parsed first name, last name, street address, city, state, zip code and email address. You can select a resume by placing a check in the box to the far right of the resume. Clicking on the box toggles it between checked and unchecked.

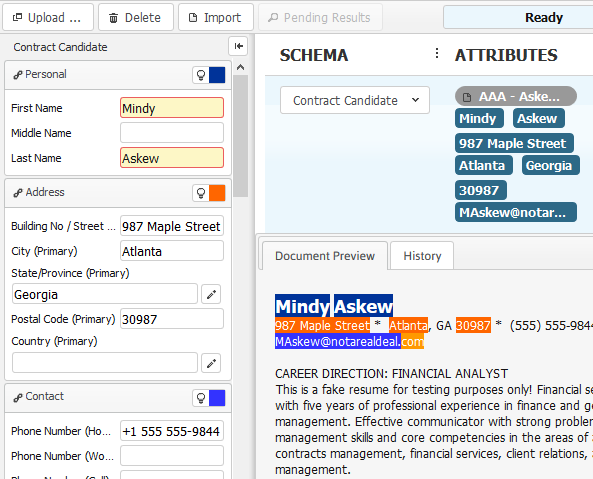
The Parsed Record
Clicking on one of the parsed fields opens the record as it will be imported into AdaptSuite. You can make any edits to the information displayed at this point.
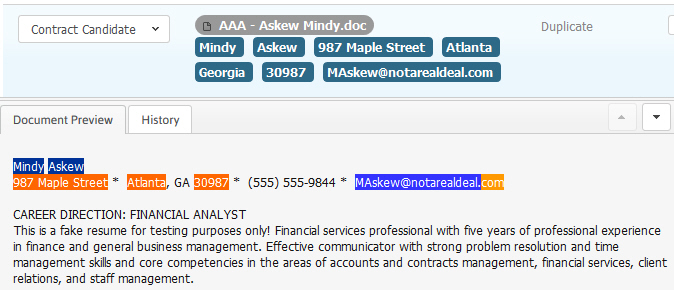
The Document Preview
Clicking on the Document Preview tab at the bottom of the screen displays the resume
Creating Search Results
You can create search results from imported entities. Click the Pending Results ![]() button. The imported entities are collected with the count indicated by the pending results button label. When the button is clicked, search results are created from all entities in the buffer, and the buffer is cleared. This allows you to run several imports and create a single set of search results from them.
button. The imported entities are collected with the count indicated by the pending results button label. When the button is clicked, search results are created from all entities in the buffer, and the buffer is cleared. This allows you to run several imports and create a single set of search results from them.
Once a set of search results is created, they can be viewed by going to the Searching menu and choosing Saved Searches. By default, they are named based on the Import Schema selected at the beginning of the workflow; in this example: Imported Candidates.