Manage Compass Portal Options
The Manage Compass Portal Options workflow allows you to edit options on the Compass Portal site associated with your branches. It also allows you to change branches associated with the Compass Portal site. While you can also change the site associated with a branch on an individual basis by using the Manage Branches functionality, this option allows you to change multiple branches at the same time.
Note: Websites are added by Adapt personnel. If you wish to add a website, please contact Adapt Support.
Accessing Manage Compass Portal Options
- Select Administration > Administration.
- In the General Administration area, select Manage Compass Portal Options.
- You will see the Manage Compass Portal Sites grid.
Changing the Site Associated with a Branch (or Branches)
- On the Manage Compass Portal Options page, place a check in the checkbox for the branches in which you want to change the Compass Portal site.
- Click Change Site Selection.
- On the Change Site window, use the droplist to select the new site.
- Click Confirm.
Note: If you want to change the name of the branch as it appears on the website, use the Manage Branches functionality.
Changing Website Settings
- From the Manage Compass Portal Sites grid, click on the name of the website in the Site Name column.
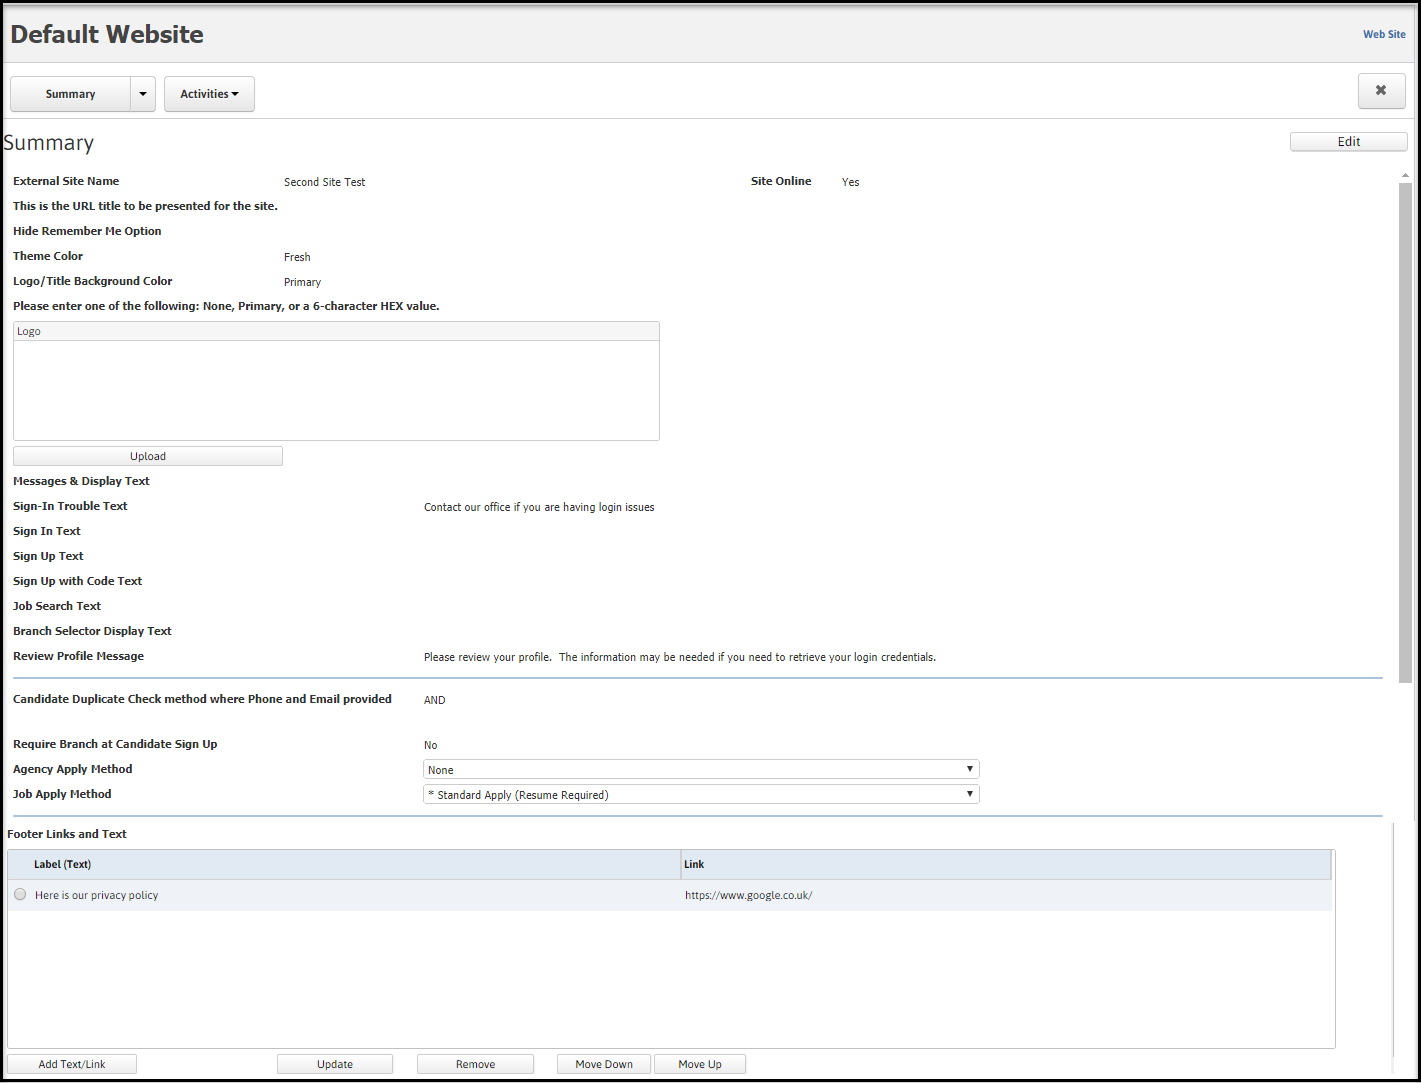
- The Summary segment of the website record displays. Click Edit.

- In the External Site Name field, you can edit the site name, if needed. This is the URL title that will be presented for the site. It is required.
- In the Site Onlinefield, use the Code Selection list to select whether the selected site should be available to Candidates. If you select Yes, the site can be accessed by Candidates. If you select No, any Candidate entering the URL of the site will receive a message that the site is not currently available. This allows you to make any changes to your site while "offline" and then, when finished, select to make the site available again.
- If you do not want the Compass Portal user to be able to select "Remember Me" on the portal login page, place a check in the Hide Remember Me Option checkbox. This is useful if the Compass Portal is on a kiosk and you don't want user login's defaulting.
- In the Theme Color field, use the Code Selection icon to select the color theme of your website.
- In the Logo/Title Background Color field, you can enter None, Primary or a 6-character HEX value (representing a specific color) to select the color of the background for your logo/title.
- In the Logo area, click the Upload button to add a logo to the Compass website. The logo must be in a JPG or PNG format. Once you have uploaded the logo, click the Confirm button. The logo appears in the Logo area.
Best to stay in the limit or ratio of 960 x 180. Otherwise the compression will skew the image. 500KB is the max file size. - In the Sign-In Trouble Text field, enter the words that you would like to display on the website if the Compass Portal user has trouble logging in. This text appears below the Do you need Assistance? text on the Compass Portal website.
- In the Sign In Text field, enter the words you would like to display above the ''Sign In to Application' button on the compass website.
- In the Sign Up Text field, enter the words you would like to display above the 'Sign Up to Register' button on the Compass website.
- In the Sign Up with Code Text field, enter the words you would like to display above the 'Create your Account' button on the Compass website.
- In the Job Search Textfield, enter the words you would like to display if the user selects to search for jobs on the Compass website. The text appears to the right of the Keywords and Location fields on the Job Search page.
- In the Branch Selector Display Text field, enter the words you would like to display on the field that allows the Compass Portal user to select a branch.
- In the Review Profile Message field, enter the words you want to display if the user does not elect to complete their profile. If the profile information is not complete, Compass displays a small window allowing the user to either Review their profile or skip the review by clicking "Remind Me Later". The words entered here are displayed along with the two options on the small window.
- In the Apply jobs on Compass Portal as Guest checkbox, place a check if you want candidates to be able to directly apply for jobs on Compass without requiring to sign in or sign up.
- In the Candidate Duplicate Check method where Phone and Email provided field, select AND/OR to specify the logic to be used for duplicate checking during Compass Candidate Sign Up, when both Email and Phone number are provided.
- In the Require Branch at Candidate Sign Up field, select Yes/No to specify if the Branch field in the Compass Sign Up page for Candidate is a required field or not. This is set to 'No' by default.
- In the Agency Apply Method field, use the droplist to s, elect the type of job application page you want to display when a Candidate signs up on Compass portal. Three methods come with the system: "Standard Apply (Resume Optional)", "Standard Apply (Resume Required)" and "None". Each (except "None") prompts for Phone Number, Email, Date Available, Skills, Certifications, Street Address, Apt/Suite, City, State and Zip. However, only the Date Available is required. The "Resume Required" method also requires a resume. If "None" is selected in the droplist, no additional job application page will be displayed on Sign Up.
- In the Job Apply Method field, use the droplist to select the type of job application page you want to display if the Compass Candidate chooses to apply for a job. Two methods come with the system: "Standard Apply (Resume Optional)" and "Standard Apply (Resume Required)". Each prompts for Phone Number, Email, Date Available, Skills, Certifications, Street Address, Apt/Suite, City, State and Zip. However, only the Date Available is required. The "Resume Required" method also requires a resume.
-
In the Footer Links and Text section, use the Add Text/Link button to create any text labels and links to be displayed in the footer of the Compass portal. This option is generally used to display informational text or to provide a link to items such as the Agency’s Privacy Policy. Use the Move Down and Move Up buttons to position the text and links in the order they should appear on the site.
- Once you are satisfied with your selections, click Confirm.
Viewing Branches Pointing to the Site
- From the Manage Compass Portal Sites grid, click on the name of the website in the Site Name column.
- The Summary segment of the website record displays. Click the Branches segment.
- A list of branches pointing to the selected site displays in the grid.
- You can set a default branch by clicking the radio button to the left of the branch name and then clicking the Set Default button. A default branch displays as the initial option when the Compass Candidate is prompted to select a branch (when a Candidate registers). However, all other branches that point to the site can be selected by the Compass Candidate by using the droplist.
Selecting Functions for the Site
You can turn on/off functions by following these steps:
- From the Manage Compass Portal Sites grid, click on the name of the website in the Site Name column.
- The Summary segment of the website record displays. Click the Functions segment.
-
The grid displays a list of functions that can be turned on/off. If a function is off, that function is not available on the Compass site. For example, if you turn on Job Search, then the option to perform a Job Search will not be available on the Compass site. The available functions are as follows:
- Job Search
- Advanced Job Search
- Apply
- Sign-Up
- Profile - My Job Progress
- Profile - Skills
- Profile - Documents
- Profile - About Me
- Time Entry
- Pay History
- Contact Time Approval
- Time Entry - Add Sick Time
- Recaptcha – Sign Up
- Recaptcha – Sign In
Note: Disabling the Sign Up function removes that specific option, but still allows a Candidate to sign up with an activation code.
For full details of setting up the Captcha tool, please refer to the setup guide found here. - Selecting a function and clicking the On/Off button toggles it between On (Shown) and Off (Not Shown). The Show on Compass column in the grid displays the current state of the function.
Note: The Refresh and Preview action must be run in order for the changes to be reflected on the site.
Updating Your Site After Making Changes
Once you have made all necessary changes to the site, click Refresh and Preview (right-side menu). This provides you with a preview of your website including a Site Configuration Summary. You can perform functions that are turned on so that you can see how your website will perform. In addition, the Refresh and Preview option refreshes your website so that the changes you have made can be seen by your Compass Candidates. Compass users will see the changes whenever they refresh the website.