Define UDF Screen

Back to Batch Control Look UpHow to Use OnLine Help


Click here to return to the Create Forms File main topic page.
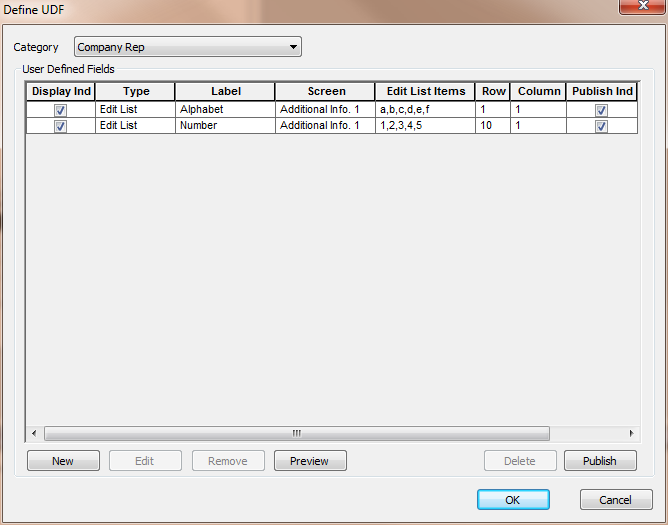
Category

Use the droplist to select the category (Employee, Company, Company Rep, Order, Assignment, Position, Vendor) of the UDF you want to work with.


User Defined Fields Grid

Once you select a category, the User Defined Fields grid displays all existing UDFs for that category. The following columns are displayed on the grid:

  • Display Ind: Indicates whether the UDF has been removed or not. A removed UDF continues to exist in your database, but does not display anywhere in Operations. A check indicates the UDF currently displays in Operations. An unchecked box indicates that the UDF has been removed and no longer displays in Operations.

  • Type: Indicates the field type of the UDF. Possible field types are:

  • Text: Field where the user can type alphanumeric and special characters.

  • Edit List: Field that displays as a droplist so that the user can select from a number of options.

  • Date: Field that has a calendar control on it allowing the user to select a date.

  • Integer: Field where the user can type whole numbers..

  • Currency: Field where the user can type numeric characters with up to two decimal places.

  • Label: Indicates the name that will appear as a label on the field.

  • Screen: Indicates the screen (Additional Info 1 or Additional Info 2) on which the UDF displays in Operations.

  • Edit List Items: Indicates the values that will display when the User clicks the droplist control on the UDF.

  • Row: Indicates the vertical positioning of the UDF. The higher the number, the further down on the Additional Info screen the UDF will appear. Selections are 1 to 15.

  • Column: Indicates the horizontal positioning of the UDF. A "1" indicates that the UDF will appear in the left column. A "2" indicates the UDF will appear in the right column.

  • Publish Ind: Indicates whether the UDF has been published or not.


New

Edit

Remove

Preview

Delete

Publish

These buttons allow you to take actions on your UDFs. The actions are:

  • New: Creates a new UDF.

  • Edit: Edits an existing UDF. You must have already selected a row in the User Defined Fields grid for this button to become active.

  • Remove: Removes an existing UDF. Remove leaves the published UDF in your database, but no longer displays it in Operations. If you remove an unpublished UDF, it deletes it from your UDF list. You must have already selected a row in the User Defined Fields grid for this button to become active.

  • Preview: Allows you to see what the UDF looks like (or will look like) in Operations. You should always preview a new UDF before publishing so you can make any necessary edits.

  • Delete: Deletes the existing UDF from your database. NOTE: Any data associated with the UDF will be lost upon deletion. You must have already selected a row in the User Defined Fields grid for this button to become active.

  • Publish: Publishes ALL unpublished UDFs for the Category. Once published, any changes made to a UDF will be immediately updated in Operations.


OK

Cancel

Click OK to save your new and/or edited UDFs. Click Cancel to close the Define UDF window without saving your new and/or edited UDFs.

NOTE: The Remove and Delete actions are not cancelled by clicking the Cancel button.


Related Topics: