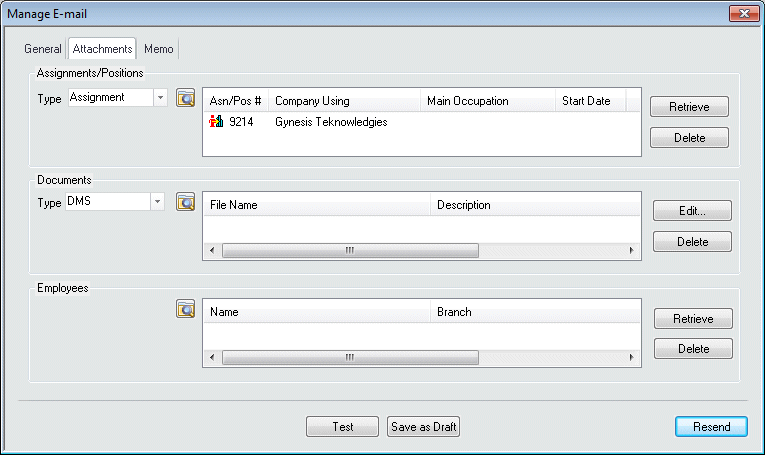
Manage E-mail - Attachments Tab
|
Manage E-mail - Attachments Tab |
![]()
The Attachments tab contains all of the information pertaining to any attachments associated with the email. There are three types: 1) Assignments/Positions, 2) Documents, 3) Employees. NOTE: Certain attachments are required for certain associated activities. Click here to access a detailed list of all required attachments.
NOTE: The file size of all attachments added together cannot exceed 4 MB.

Click here to return to the Send E-mail To main topic page.
|
Assignments/Positions
|
The Type field allows to select whether you want to look up assignments or positions. Use Once you have determined the type, click The lookup and retrieve buttons are disabled if:
AND
The grid displays the following information:
The Retrieve button takes the selected assignment(s)/position(s) from the StaffSuite grid and puts them in the Assignment/Position grid. The Delete button allows you to remove assignments/positions from the Assignment/Position grid (if you no longer want to attach them to the email). |
|
|
|
|
Documents |
The Type drop-list allows you to select whether you want to search for a document in the Document Management System (DMS) or on a local or networked drive (Local/Network). Use Once the type has been selected, click The lookup is disabled if:
AND
The grid displays the following information:
The Edit button opens the selected document in its associated application window (for example, a .txt document normally opens Notepad, while a .doc document normally opens Microsoft Word). Once you have edited the document and saved it, you will be prompted to reload the file. If you answer Yes, the changes you made will be saved to the attached document (HOWEVER, this does not change the actual document in DMS or on your local/network drive...it ONLY changes the attachment). If you answer No, your changes will be discarded. The Delete button allows you to remove documents from the Documents grid (if you no longer want to attach them to the email). |
|
|
|
|
Employees |
Allows you to attach information about employees to your email. Click The lookup is disabled if:
AND
The grid displays the following information:
The Retrieve button takes the selected employee(s) from the StaffSuite grid and puts them in the Employee grid. The Delete button allows you to remove an employee from the Employee grid (if you no longer want to attach them to the email). |
|
|
|
|
Test |
Allows you to send yourself a test email. The email is sent to the email address of the logged in user. No activities are created and the email is NOT saved. This gives you the opportunity to look at the email as your recipients will see it before actually sending it out. |
|
|
|
|
Save as Draft |
This allows you to save the email instead of sending it out. In order to do so, all required fields must be entered. |
|
|
|
|
Send Now Schedule ReSend |
This button's name changes based on circumstances:
If the email is Scheduled, it is saved, but no activities are created. Then, on the date indicated by the Send On field, StaffSuite will send the email at the time specified in the config.xml file. At that point, any associated activity is created. If the email is Sent, then it is saved, sent out, and any associated activity is created. If the email is Resent, then a new email is saved, send out, and any associated activity is created. |
|
|
|
![]()